The MyMirrorClub Editor keeps getting easier to organize - especially when a design starts growing from a few simple objects into a full photo booth template or animation.
We previously added custom layer names so creators could identify every object in a project. Now we have taken the Layers panel another major step forward with drag-to-reorder layers.
You can now grab a visual layer with your mouse and move it up or down in the Layers panel to control what appears in front of or behind other elements on the canvas.
Watch the enhanced Layers panel in action
In this walkthrough we start with a New Canvas, add several design elements, rename the layers, and then rearrange them directly from the Layers panel.
Your Layers panel is now a real organization workspace
Every image, text object, shape and other visual element you add to your project appears in the Layers panel. Instead of searching around the canvas to figure out which object you are editing, you can work from one organized list.
That becomes especially useful when a project contains many overlapping graphics, decorations, frames, logos or text elements.
Rename layers so you know exactly what everything is
Generic names such as Image are fine when a project has only one or two elements. Once a design becomes more detailed, descriptive names make a huge difference.
MyMirrorClub lets you rename layers directly in the Layers panel. You might use names such as:
- Balloons
- Arcade Machine
- Logo
- Main Title
- Photo Frame
- Background Decoration
Your custom name stays attached to that layer, making it much easier to recognize and manage later.
Now drag layers to move objects in front or behind
The newest improvement makes layer ordering much more visual.
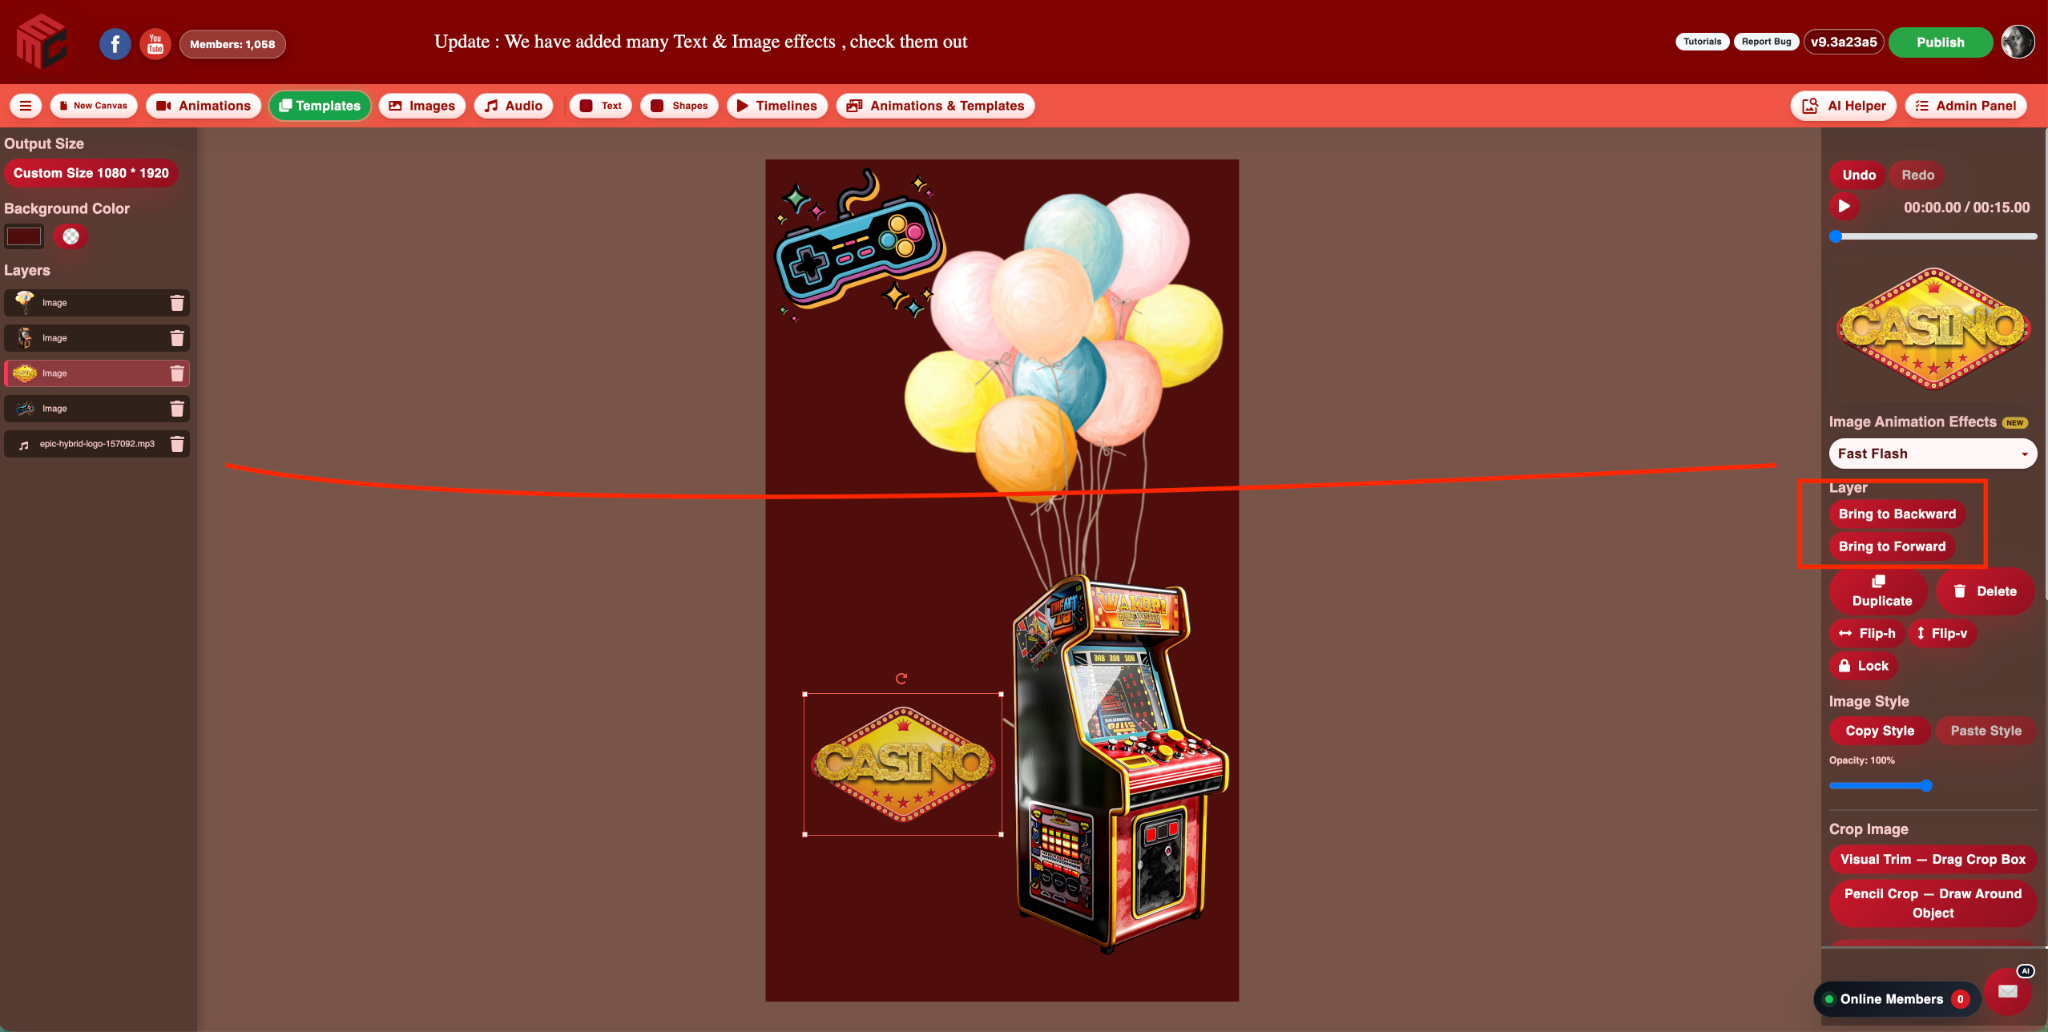
Instead of repeatedly using Bring Forward or Bring Backward, simply grab the layer in the Layers panel and drag it to the position you want.
Important: in the MyMirrorClub Layers panel, layers positioned lower in the list appear in front of layers above them.
So if a decoration should appear on top of another graphic, drag its layer farther down. If it should sit behind another object, move the layer upward.
You can immediately see the stacking order change on the canvas while you organize the design.
A faster way to build layered photo booth designs
This is especially useful when creating designs where several objects overlap. For example, you can:
- Move decorative balloons behind a title.
- Place a logo above a background graphic.
- Put a frame in front of a photo-area design element.
- Move a foreground decoration above another image.
- Rearrange several graphics without hunting through right-side controls.
Because the complete layer is being moved, its existing settings stay attached to it. You are changing its stacking position - not rebuilding the object.
Bring Forward and Bring Backward are still available
Nothing has been taken away. The traditional layer-order controls are still available when you want them.
Drag-to-reorder simply gives you another, faster option. For many projects it is much easier to look at the complete Layers panel and move an object exactly where it belongs with the mouse.
Undo and Redo stay part of the workflow
Layer reordering is designed to work naturally with the editor workflow. A drag is treated as a meaningful layer-order action, so you can continue using Undo and Redo while organizing the design.
Audio stays separate from visual stacking
Audio can still appear in your project Layers, but audio does not have a visual front-or-behind position on the canvas. The drag-to-reorder feature is intended for the visual layers whose stacking order actually changes the design.
Custom names plus drag-and-drop makes complex projects easier
The real power comes from combining these two improvements.
First, name your layers so you know what they are. Then drag them into the exact visual order you want.
That gives creators a much clearer workflow for both photo booth templates and animations. A project with many design elements no longer has to feel difficult to navigate.
How to reorder layers in MyMirrorClub
- Open the MyMirrorClub Editor and start a new template or animation.
- Add the images, text and shapes you want to use.
- Use the Layers panel on the left to identify each object.
- Rename layers when helpful so the project is easy to understand.
- Grab a visual layer and drag it up or down to change its stacking position.
- Remember: lower layers in the panel appear in front of the layers above them.
Designed to make the editor easier, not more complicated
Our goal with these improvements is simple: give creators more control while reducing unnecessary clicks.
Advanced editing does not have to mean a complicated interface. A clear Layers panel, meaningful custom names and direct mouse reordering can make even a detailed project much easier to understand.
This is another step toward making the MyMirrorClub Editor faster, more visual and more intuitive for everyday photo booth design work.
FAQ: Can I rename layers in MyMirrorClub?
Yes. You can give layers custom names so images, text, shapes and other elements are easier to identify inside larger projects.
FAQ: How do I put one layer in front of another?
Drag the visual layer farther down in the Layers panel. Layers lower in the list appear in front of the layers above them.
FAQ: How do I move a layer behind another object?
Drag that layer upward in the Layers panel until it sits above the layer you want displayed in front.
FAQ: Are Bring Forward and Bring Backward still available?
Yes. Those controls remain available. Drag-to-reorder gives you a faster visual method when you prefer to organize layers directly from the Layers panel.
FAQ: Does reordering a layer remove its effects or settings?
No. Reordering changes where the layer sits in the visual stack. The layer itself remains the same object with its existing design settings.
Try the enhanced Layers workflow
Open the MyMirrorClub Editor and try building a design with several overlapping objects. Rename the layers, drag them into position, and see how quickly you can control the complete composition.
If you are new to MyMirrorClub, you can also create a free account and receive one free publishing credit to try the editor.